Inside Machines: A teach-position method calibrates tools used by six-degrees-of-freedom (6DoF) robots for peak efficiency and improves industrial processes.

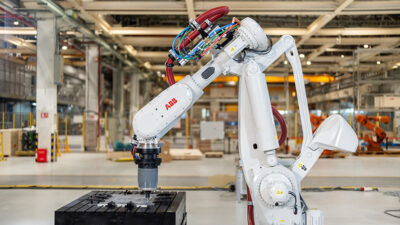
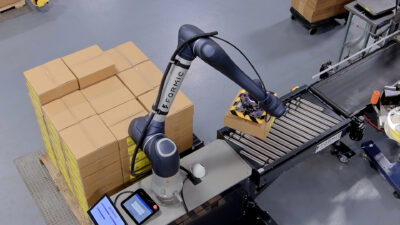
As robots become more sophisticated, they are being implemented into more industrial processes. Six-degrees-of-freedom (6DoF) robots are capable of complex movements that enable them to perform well in many complicated industrial tasks such as palletizing, handling, gluing, and welding. A 6DoF robot can lift and deftly manipulate heavy payloads, precisely moving them with complex geometry.
Because of their high-performance capabilities and flexibility, 6DoF robots are assigned many industrial tasks using a wide variety of tools. However, taking advantage of the capabilities of these robots requires precise re-calibration every time a new tool is introduced. Re-calibration is often time-consuming and inaccurate, inhibiting industrial processes, and delays in production.
There is an effective teach-position method that quickly calibrates a new tool used by a 6DoF robot without relying on manufacturer measurements or external sensors. The method is easy, accurate, and useful in practical applications.
Calibration of a 6DoF robot
A 6DoF robot holds and moves a tool to perform a task. The robot must know the exact location of the tool while it works. Each time a different tool is attached, the robot must be precisely re-calibrated.
Methods for calibrating 6DoF robots include: touching reference parts, using distance sensors, and employing laser interferometry. A robot also can be calibrated using external sensors, such as camera systems, that can be attached to various robot locations to acquire the precise position of a reference object.
These methods can be time-consuming and complicated. A teach-position method was developed as an easier alternative and has already achieved excellent results.
Determining the tool center point
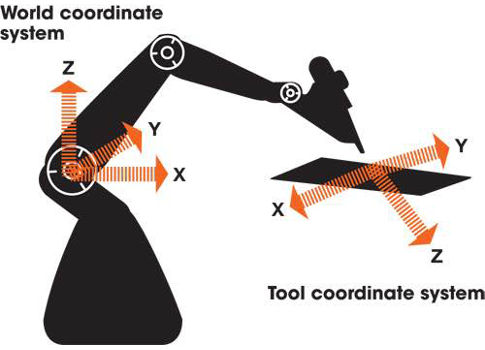
Kinematic calibration methods are used to determine the tool center point (TCP), the point in relation to which all robot positioning is defined. The TCP is defined relative to the world coordinate system, the Cartesian coordinate system for any point in the world, which always remains stationary with respect to the robot (see Figure 1).
The tool coordinate system defines the position and orientation of the tool and is at a zero-position at the TCP. The TCP of the robot moves to programmed positions as it executes a Cartesian motion. Changing the tool changes the tool coordinate system, requiring re-calibration to enable the new TCP and accurately reach the target.
In many robot applications, the motion trajectories of the TCP represent complex paths in the robot’s working space, typically a straight-line path with some orientation change of the tool by the robot. The tool itself might need to be replaced occasionally or more frequently. Each time the tool is replaced, a new set of geometric parameters must be determined and assigned before operations can continue.
For most industrial applications, a teach-position method is the most practical means for writing robot tasks. With this method, tool parameters have to be available (usually from the manufacturer) with high accuracy. The angular offsets of the tool and its Cartesian offset are necessary for generating straight-line paths with a controlled orientation of the tool.
Quite often, the operator is expected to identify the tool geometry under certain constraints such as:
- No prior knowledge on tool dimensions from the manufacturer
- No available hardware assistance
- No knowledge about how the tool is mounted on the robot flange.
Faced with these constraints, the operator must undertake time-consuming calibration procedures every time the tool is changed.
Using a teach-position method for exact calibration
A method for quick, exact estimation of tool geometry without external sensors, vision, or other aids was developed without requiring the dismounting the tool. By using this teach-position method, the operator simply brings the 6DoF robot’s TCP to several different positions/orientations, which are then automatically input to the tool-dimension estimation algorithms. The algorithms quickly determine precise calibrations of the new tool and prepare it for use.
The accuracy of this calibration method improves with more tool positions/orientations that are used as input to the algorithms. Experiments show that while using an inverted homogeneous matrix does not necessarily lead to desired results, using least-squares estimation results in values that lead to precise calibration.
Testing a teach-position method
Tests were performed using a 6DoF robot with a mounted tool, six high-performance servo drives, and a controller. A teach-position method involves an analytical calculation and does not require the dismounting of the tool. The XYZ dimensions are estimated and the tool tip is assumed to be in constant Cartesian location.
It is axiomatic that all robot configurations that point to the same location must lay on a sphere with the tool tip in the center of the sphere (see Figure 2). Taking measurements of points that lay on the sphere enables calculation of the TCP.
Equation 1:
R2 = (X – Xt)2 + (Y – Yt)2 + (Z – Zt)2
In equation 1, there are four unknown parameters (R, Xt, Yt, Zt), where t represents the center. The values of X, Y, and Z are calculated by direct kinematics. To reach acceptable accuracy, the method requires at least four points to define a sphere. Therefore, four such configurations include:
R2 = (X1 – Xt)2 + (Y1 – Yt)2 + (Z1 – Zt)2
R2 = (X2 – Xt)2 + (Y2 – Yt)2 + (Z2 – Zt)2
R2 = (X3 – Xt)2 + (Y3 – Yt)2 + (Z3 – Zt)2
R2 = (X4 – Xt)2 + (Y4 – Yt)2 + (Z4 – Zt)2
If the four points define a circle (three points with one redundant point also in the circle), the points can exist on many spheres in which case the sphere center is not calculable.
By using equation subtraction, not only is the unknown variable R eliminated, but all nonlinear components in the equations are cleared. This leaves a set of polynomial equations of degree 1 which can be solved by linear least-squares fitting. Taking more than four points results in more equations and higher accuracy.
The step-by-step method requires the consideration of at least four measurements as shown in Figure 4.
A teach-position method
A teach-position method is quick, accurate, and inexpensive, enabling tool calibration without dismounting the tool. The method can be performed without dedicated hardware, saving time and effort whenever a new tool is mounted. Machine builders can easily implement the method and benefit from the quick, precise, and virtually cost-free re-calibration of 6DoF robot tools that will enhance and speed up production in a wide variety of applications.
Eran Korkidi, M.Sc., is a software and application engineer, and Mirko Borich, M.Sc., is a manager, both in the motion group at Servotronix. Edited by Emily Guenther, associate content manager, CFE Media, Control Engineering, [email protected].
MORE ADVICE
Key Concepts
- A teach-position method speeds tool calibrations.
- Six-degrees-of-freedom robots play a key role in performing multiple industrial tasks.
- A teach-position method will speed up production and is cost-effective for machine builders.
Consider this
Would this teach-position method speed your robotic restarts after tool changes?
ONLINE extra
See related stories linked below.


